Manually maintaining the Tax Area and Tax Jurisdiction tables within Dynamics 365 Business Central is a time-consuming and error-prone task. Especially if you have a facility in California and ship within the state. California frequently updates district rates, tax jurisdictions, and enforces complex destination-based (Ship-to Address) tax rules. Our app removes that burden by automatically calculating the correct sales tax for California shipments, pulling data directly from the CDTFA (California Department of Tax and Fee Administration) website. You no longer need to second guess rates or manage your own tax tables. In addition to accurate calculations, the app also simplifies compliance by generating Schedule A, the form required for tax filing with the CDTFA.
Most of the existing sales tax automation apps on the market are expensive, often overkill if you’re only selling within California. Maintaining your own tax tables inside Business Central is a ton of work, and nobody has time for that. Tax rates change constantly, and staying up to date manually is nearly impossible. This app eliminates those headaches and keeps your tax reporting accurate and efficient, so your team can stay focused on what matters.
Installation & Setup #
This app is licensed through Microsoft. To purchase and deploy it in your production environment, follow the instructions in the link below:
How to purchase and license the app through Microsoft AppSource
Assign User Permission Set #
- Open the User Card for each user that is assigned a license,
- In the User Permission Sets group, add the APECATAXCONNECTOR permission sets
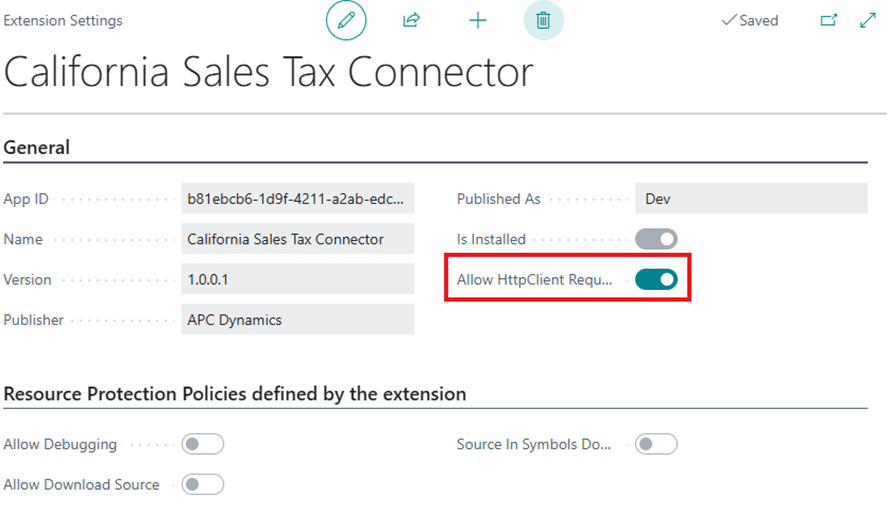
Verify HttpClient Request enabled #
- Open the Extension Management page
- Open the California Sales Tax Connector app page
- Enable the Allow HttpClient Request checkbox
Setting the Tax Group, Jurisdiction, and Details #
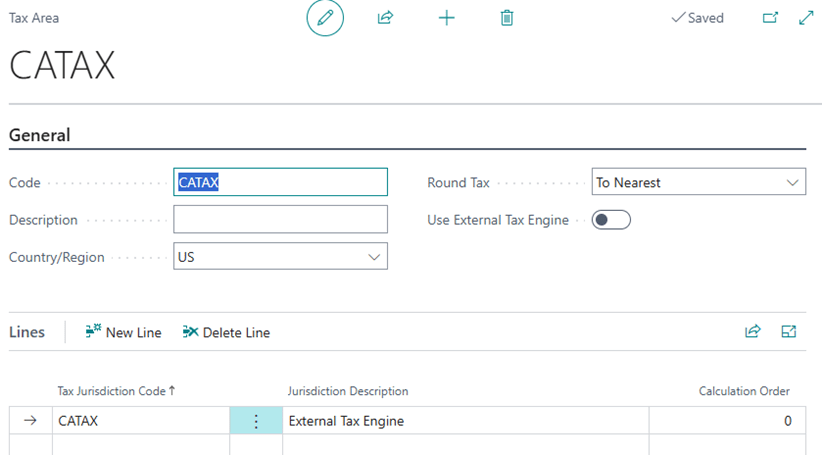
The app uses the Tax Area Code CATAX to indicate that the line should be sent to CDTFA for sales tax calculation. For all your California customers and customer Ship-to Addresses, you will need to set them to CATAX for the sales tax to be calculated.
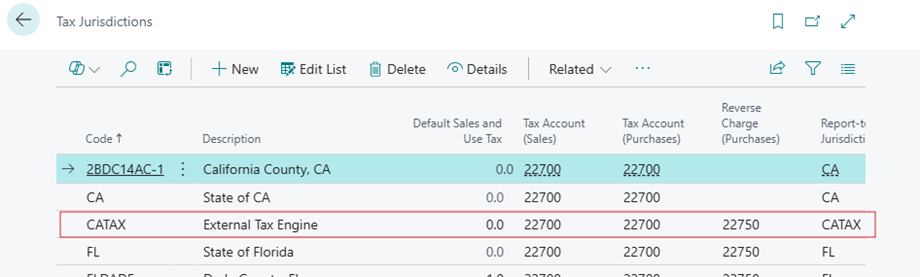
Setup Tax Jurisdiction #
- Open the Tax Jurisdiction page and create a new code that will be used for the sales tax calculation. In this walkthrough, we will use CATAX
- Define the Tax Account (Sales), Tax Account (Purchase) G/L Accounts
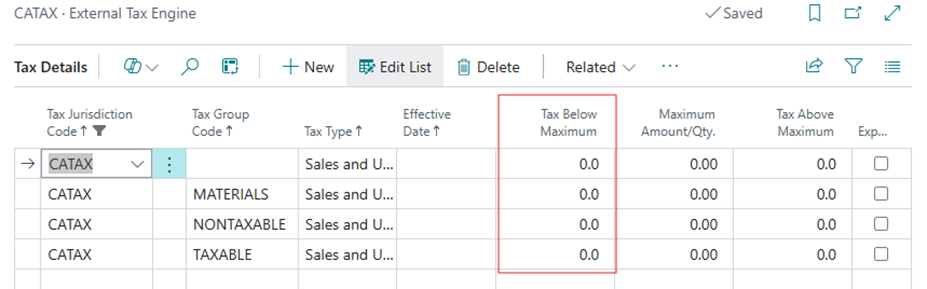
Setup Tax Details #
- Open the Tax Details page
- Create the Tax Details for the new Tax Jurisdiction code for each Tax Group Code that is set up in your environment. Ensure that the Tax Below Minimum field is all set to 0.
Setup Tax Area #
- Open the Tax Areas page
- Create a new Tax Area for CATAX and fill in the Tax Jurisdiction code with CATAX as well
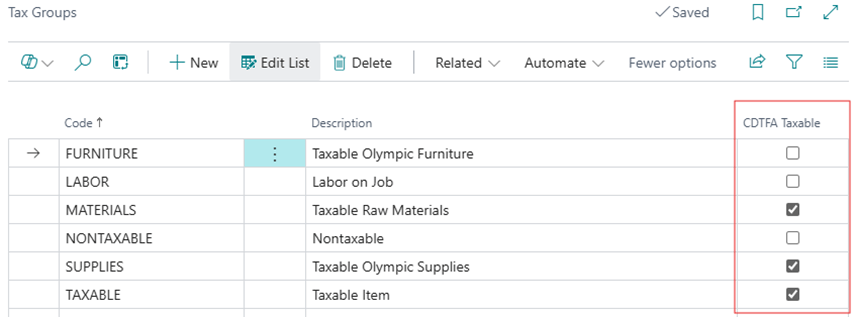
Setup Tax Group #
- Open the Tax Groups page
- Place a checkmark in the CDTFA Taxable field for the Tax Group Codes that should be taxable under CDTFA guidelines