

Here are the main steps to follow when creating Item Restrictions:
- Open the Item Restrictions page
- Select +New to create a new entry
- On the header area, there are a few fields to note:
- Restricted from / Approved to
- Restricted From – Indicates that the customer, vendor, and items that are on this item restriction is blocked from sales / purchase.
- Approved to – Indicates that the customer, vendor, and items that are on this item restriction can ONLY buy and sell from this list
- Starting Date – The start date of the restriction. Leave blank if not applicable
- Ending Date – The ending date of the restriction. Leave blank if not applicable
- Enabled – When ready, check this on to enable the item restriction rule
- Restricted from / Approved to
Adding or Removing Vendor/Customers on the Restriction #
To add or remove customers and vendors on the restrictions, do the following:
- Select the Add/Remove Customers for Customers or Add/Remove Vendors for Vendors.
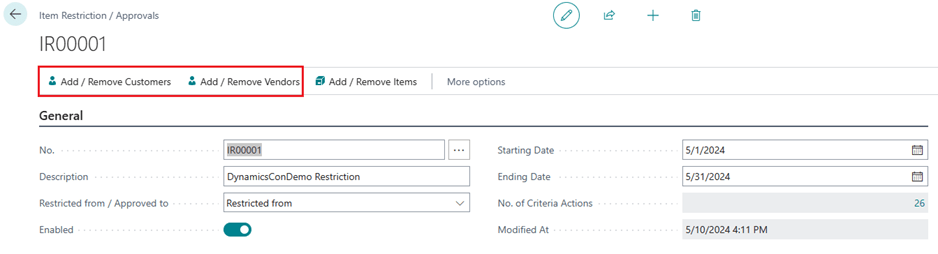
- Specify whether you want to add or remove the customers or vendors from this list
- Define the filters that you would like the process to run to add the vendor or customers
- Select OK

To remove customers or vendors that are on this list, repeat the same process but select Remove on the Add / Remove field in the Options tab.
Adding or Removing Items on the Restriction #
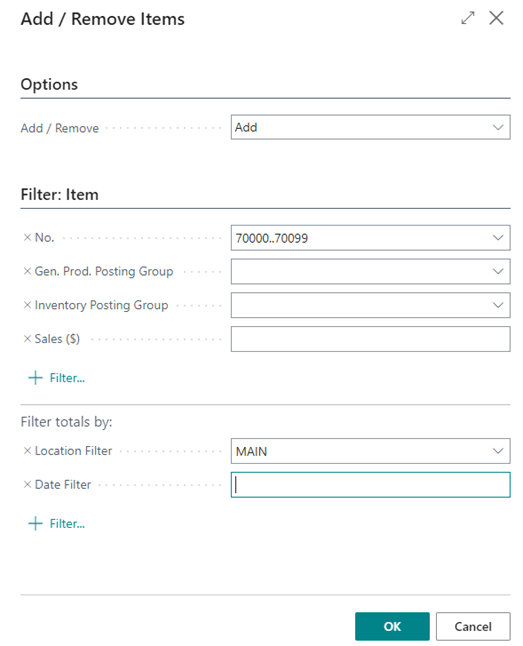
To add or remove items on the restriction, do the following:
- Select Add/Remove Items
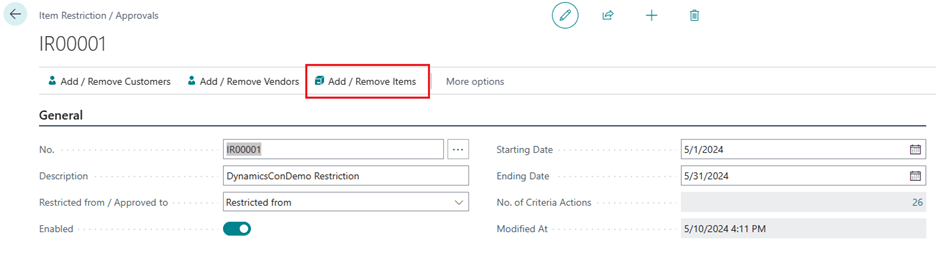
- Specify whether you want to add or remove the items from this list
- Define the filters that you would like the process to run to add the items
- Select OK
To remove the items that are on this list, repeat the same process but select Remove on the Add / Remove field in the Options tab.
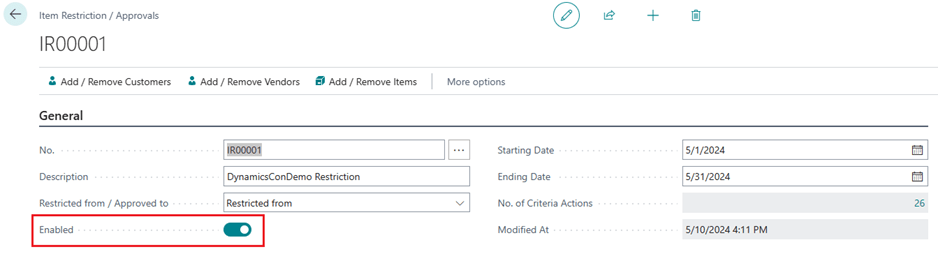
Enable Item Restriction/Approval #
You must set the Enabled field to True once you have the Item Restriction/Approval record set up the way you want.
Results #
With the Item Restriction/Approval record enabled, you will receive an error message if you try to use an item listed in the restriction.


