

Setting Up Purchase Order #
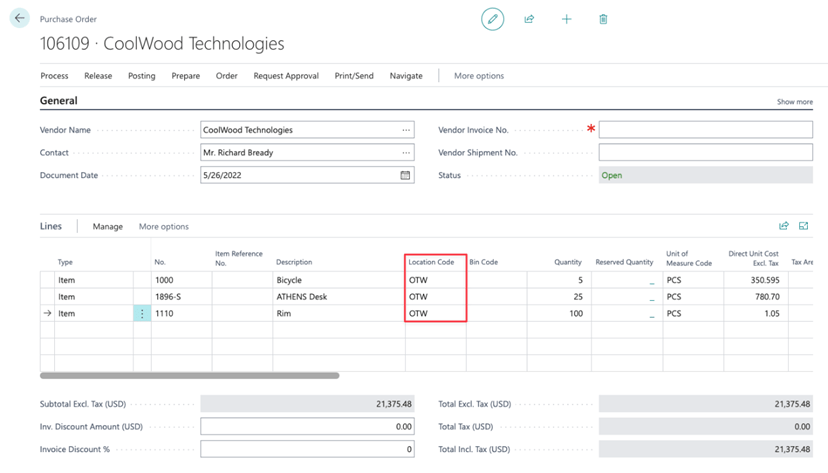
- Open or Create a Purchase Order.
- Add purchase lines that will be shipped through a container and set the location to either the On The Water or Final Destination location code. If using the On the Water option, the location code on the Purchase Lines will update to match the On the Waterlocation used on the Container when you process the Departue.
- Set Item Tracking for any Serial/Lot Controlled items on the Purchase Document or from the Container record.
Create a Container Document #
- Open the Containers list page and click the New action
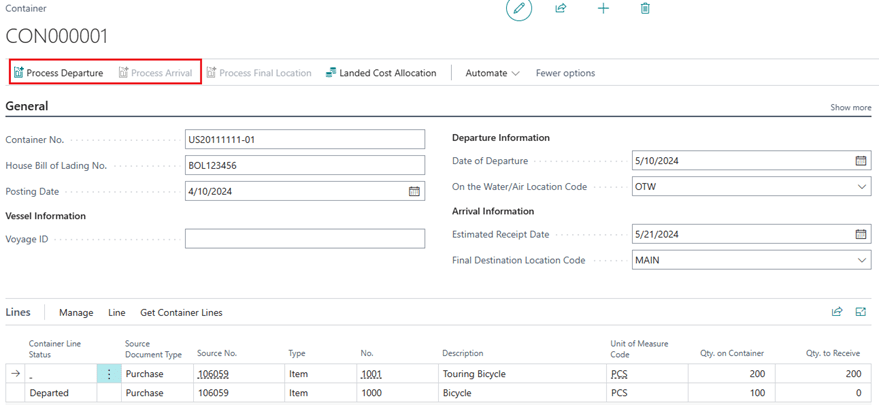
- Enter your container information as well as your Departure and Arrival information.
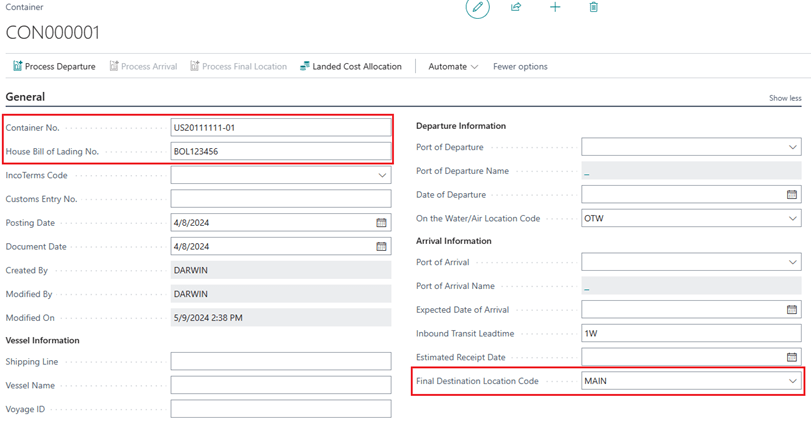
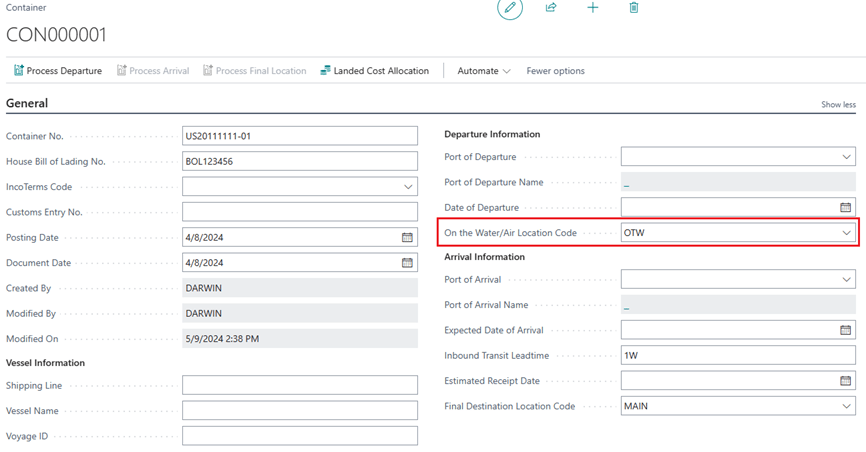
Specify On the Water Location #
The On the Water/Air Location Code (OTW) will default to the location you specify in the ‘On the Water/Air Location’ on the Freight Container Management Setup page. If you leave the OTWcode blank on the Container record, the inventory will not be received in the system until you process the Final Location.
Get Purchase Lines #
If using On the Water Location:
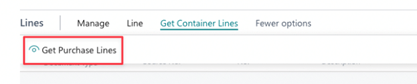
On the Container Line, select Get Container Lines and then Get Purchase Lines. The system will display purchase lines for both the On the Water Location and the Final Destination Location that have not yet been assigned to any container documents.
If NOT using On the Water Location:
When you select Get Purchase Lines, the page will only display purchase lines assigned to the Final Destination Location that are not yet linked to any container documents.
- On the Container Line, select the Get Container Lines menu and select Get Purchase Lines to open a list of purchase lines. This list will display purchase lines that have not been assigned to any Container Documents.

- Get Purchase Lines Fields
- Document No.
- Purchase Order Document No.
- Line No.
- Purchase Order Line No.
- Buy-from Vendor No.
- Purchase Order Buy-from Vendor No.
- Type
- Purchase Order Line Type
- No.
- Purchase Order Line No.
- Description
- Purchase Order Line Description
- Unit of Measure Code
- Purchase Order Line Unit of Measure
- Location Code
- Location Code assigned to the Purchase Order Line
- Quantity
- Purchase Order Quantity
- Qty. to put on Container
- Available Quantity which will be added to the Container. You can adjust this qty once the container line is created.
- Purchase Qty. Received
- Purchase Order Line Qty. Received
- Qty. Assigned to Containers
- The Qty. that has already been added to any container.
- Document No.
- Select purchase lines that should be included in this container based on the shipping document then select OK.

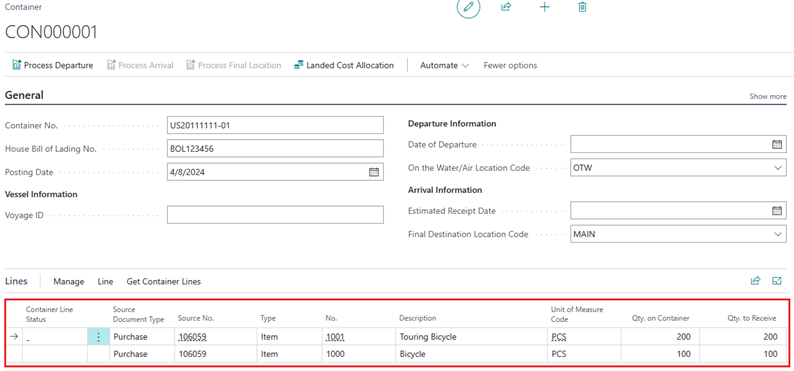
- The purchase lines have been imported into the Container Document Line.
Processing Departure #
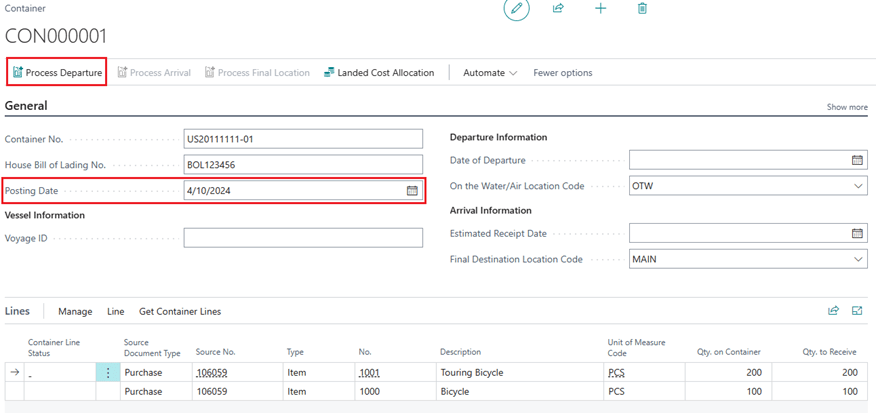
- Enter the Posting Date based on vendors’ shipping document and select Process Departure. The purchase document will be posted as received using the Posting Date on the Container Document.
- Select Yes.
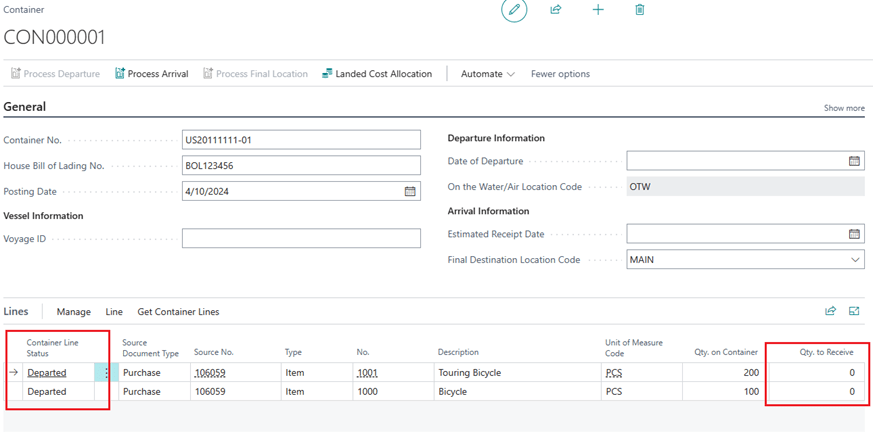
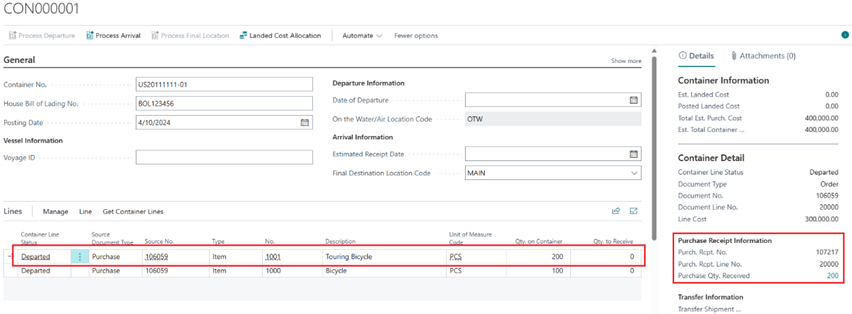
- The Container Status will be changed to Departed and the Qty. to Receive will be 0 if the OTW location is being used.
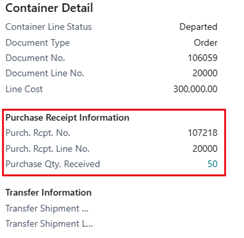
- When using the OTW location, you can view the Posted Purchase Receipt Information in the right side FactBox of the Container Document under the Purchase Receipt Information section.
- When using the OTW location, a transfer order will be automatically created to move the inventory from the On the Water/Air Location to the Final Destination Location. You can open the transfer order by clicking on View Transfer Order Document under the Container Line menu.

Process Arrival #
- Before the vessel arrives, you can update the Expected Date of Arrival on the Container Document. NOTE: If using the On the Water/Air Location Code in this Container Document, this is the last chance user can update the Final Destination Location Code.
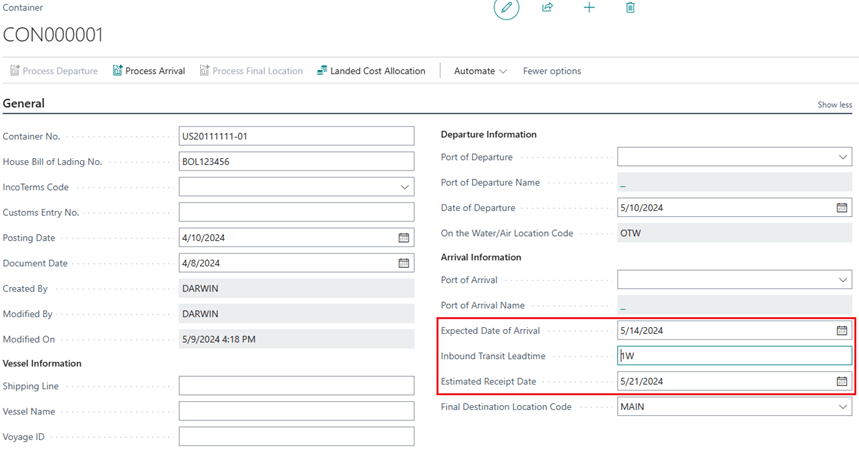
If the Inbound Transit Leadtime is maintained, the Estimated Receipt Date will update based on the expected arrival date and the lead time.
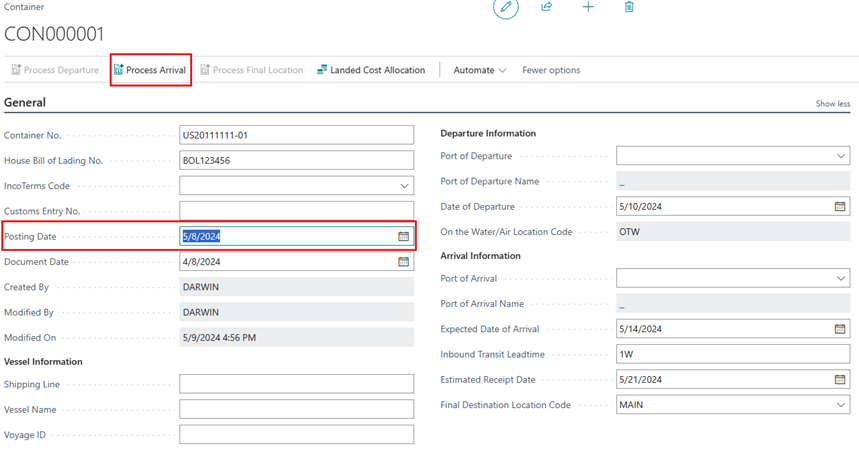
- When vessel arrives, update the Posting Date on the Container Document, and select Process Arrival.
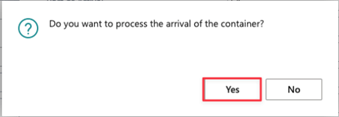
Select Yes to proceed with the Arrival process.
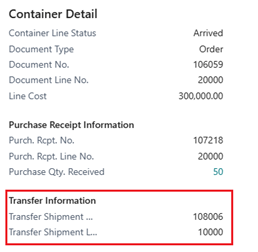
- Once the Arrival process is complete, the Container Status and Container Line Status fields will be set to Arrived.
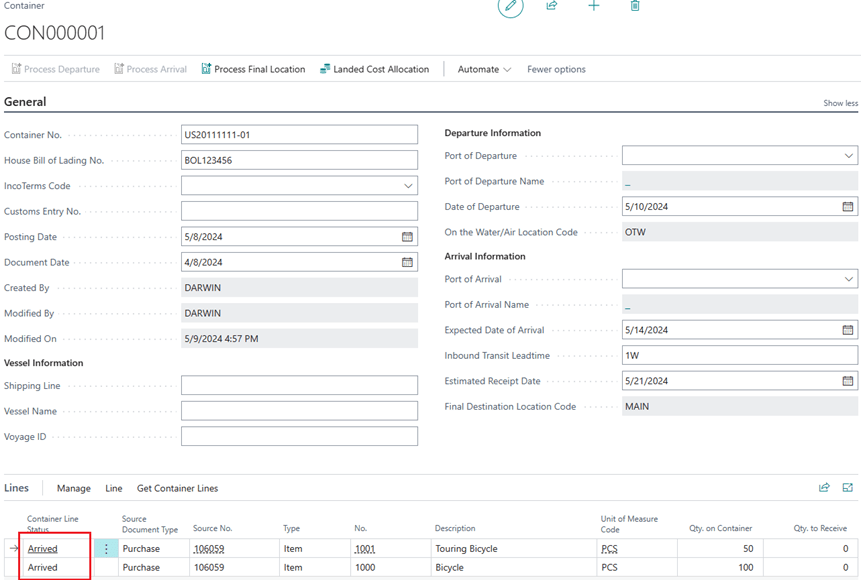
Additionally, the associated transfer order for this Container Document will have a Transfer Shipment posted using the Posting Date on the Container Document. This will move the inventory from On the Water/Air Location to the In-Transit Location. You can view the posted transfer shipment info on the Container Document FactBox.
*The Posting Date of the Posted Transfer Shipment will be the same as the Posting Date on the Container Document that you updated prior to clicking on Process Arrival.
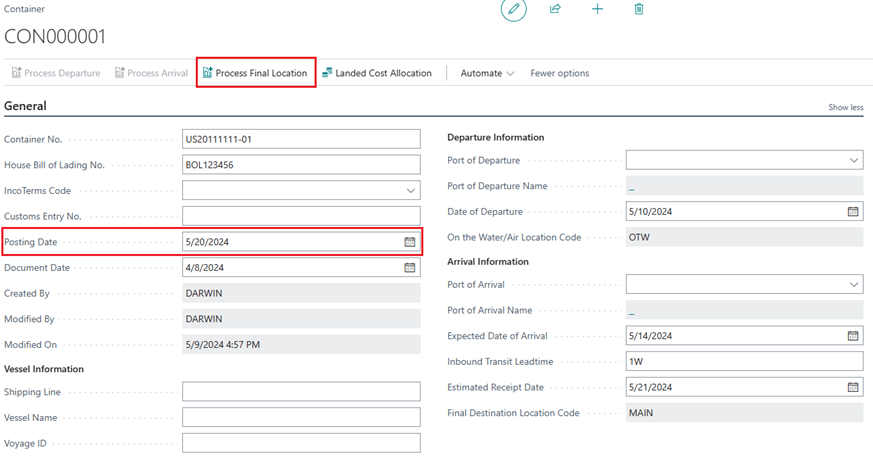
Process Final Destination #
- When the Container finishes customs clearance at the port, you can update the Posting Date on the Container Document and select Process Final Location. If not using the On the Water location, this step will receive your purchase lines into the system.
Select Yes to proceed with the Post Container Document process.
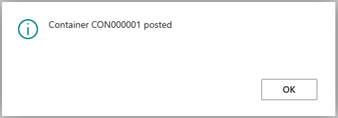
- You will see a message alerting you to the Posted Container No. created during the Final Location process.
- The associated transfer order for this Container Document will have a Transfer Receipt posted using the Posting Date on the Container Document. The inventory will be moved from the In-Transit Location to the Final Destination Location.
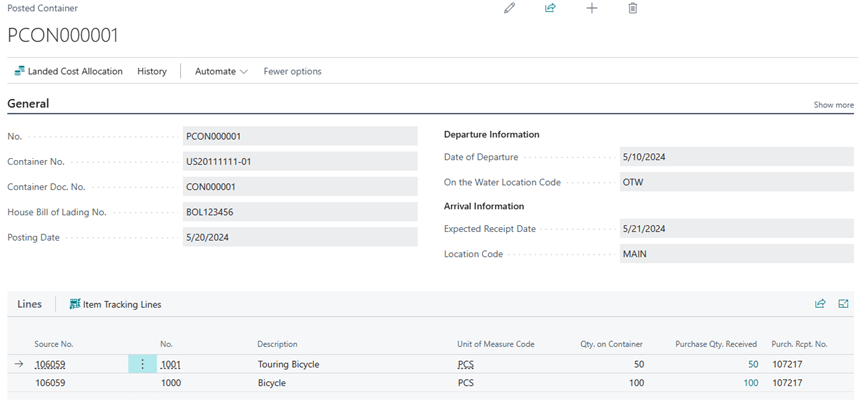
- The Container Document will be deleted once it is fully processed and a Posted Container Document will be created.
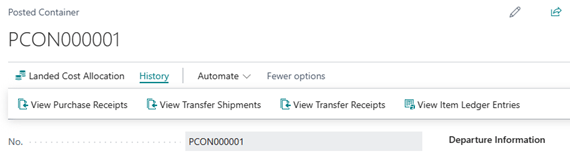
- You can view any posted document associated with this Container by clicking on the History action and selecting the documents you want to view.
Adjusting Quantity #
If using On the Water, you can only update the Quantity to Receive prior to the line being marked as Departed. If not using On the Water, you can update the quantity on the Container Document Line before receiving the container into the final destination.
To change the quantities, click on a container line:
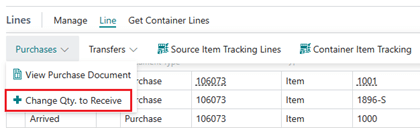
- Select the Line > Purchases > Change Qty. to Quantity.
- A pop-window will display the purchase line information of the selected item. Enter the correct quantity in the New Qty. to Receive then select OK.
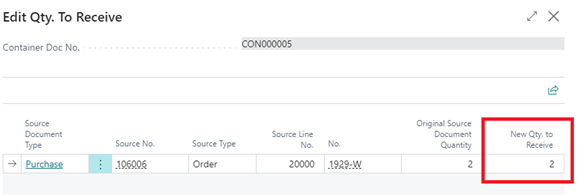
* If the quantity is greater than the quantity ordered, a new purchase line will be added into the Container Document and the original Purchase Document addressing the additional quantity. If the quantity is less than the quantity ordered, then it will just update the Qty. to Receive on the purchase line.
Undo Departure #
There may be times when you need to update the container lines after Departure, for example updating the Quantity to receive. This can only be performed when a Container line is in the Departed Line Status.
- Select the Container Line that should be undone.
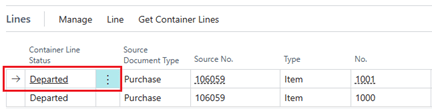
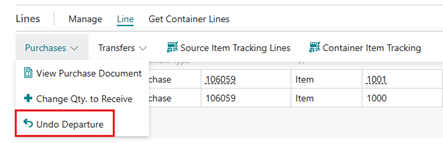
- Click the Line action and select Purchases>>Undo Departure
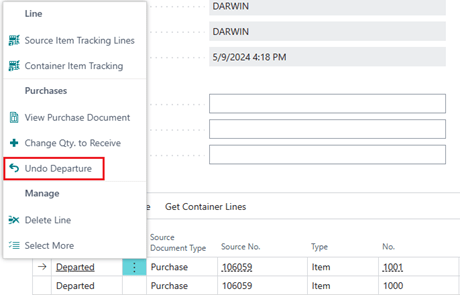
You are also able to select the Show More button onContainer Line to select Undo Departure
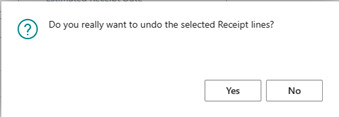
- Click Yes
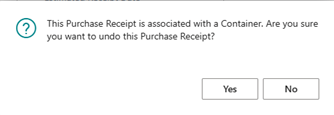
- Click Yes
- The Container Line Status will now be reset back to the blank, pre-Departure status and the Qty. to Receive will be reset to the original Qty.

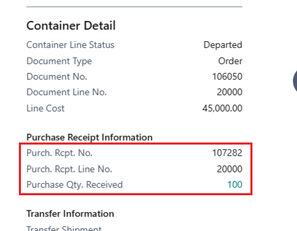
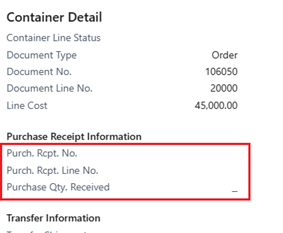
You will see that the Purchase Receipt Information for that line will update from filled in to blank.
Before Undo Departure: After Undo Departure:
This will also disable the Process Arrival and re-enable the Process Departure actions at the top of the Container Card:
- You can now adjust the Container Qty. as needed:

- When ready, click Process Departure to reprocess any line not in the Departed status.
- The Container Line will now show as Departed and the Purchase Receipt Information will be updated with the new receipt information:
Serial/Lot Controlled Item Lines #
To process serial or lot controlled items, you must add the tracking information for those items to the correlating container line.
To add the Serial or Lot numbers to your container line:
- Select the container line that should have tracking information added.

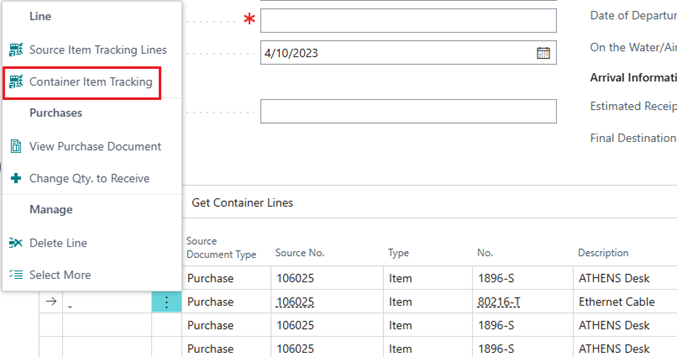
- Select the Line action button and then select Container Item Tracking from the dropdown menu to open the Container Tracking page.
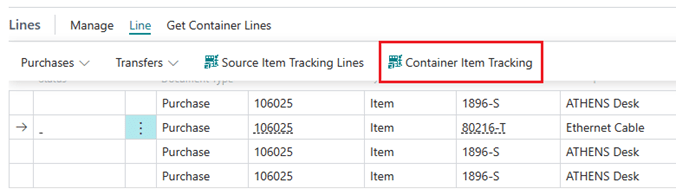
Alternatively, you can select the Show more actions button on the Container line and select Container Item Tracking.
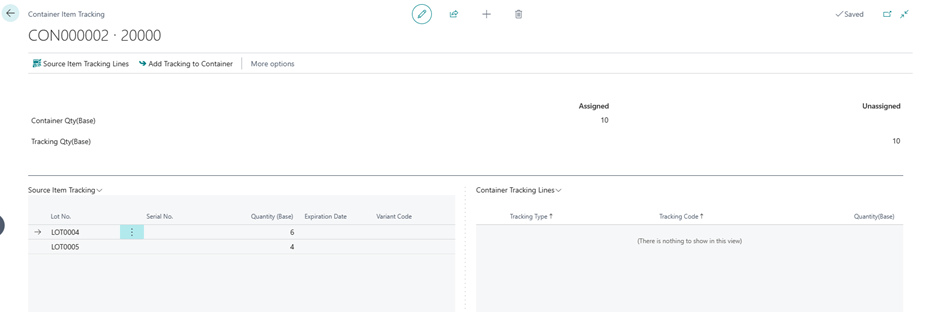
- The Container Tracking Line will open, displaying the following fields: Assigned Container Qty (Base), Unassigned Container Qty (Base), Assigned Tracking Qty (Base), and Unassigned Tracking Qty (Base). Please note that tracking quantities are managed using the Base Unit of Measure quantities. Additionally, this page displays the Item Tracking for the source document in the Source Item Tracking list and the tracking lines to be processed in the Container Tracking Lines sections.
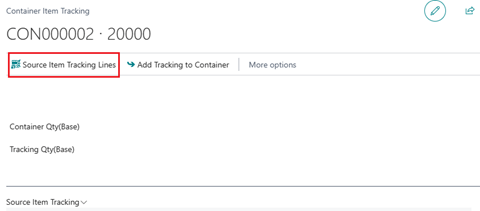
- If you do not see any records in the Source Item Tracking section, select Source Item Tracking in the actions bar to open the Item Tracking Lines setup for the purchase line.
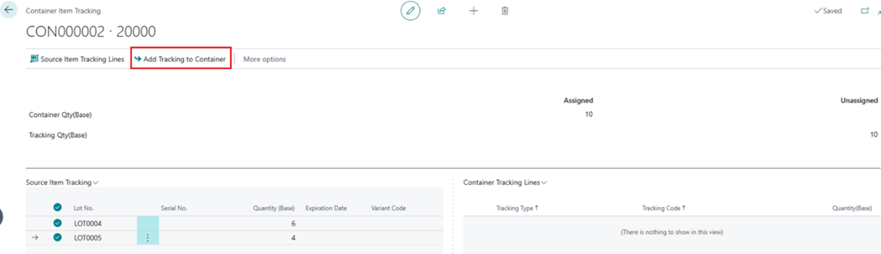
- Select the tracking lines in the Source Item Tracking section and click Add Tracking to Container in the actions bar to assign tracking to the container line. The lines you select should match the serial or lot numbers that are on the shipping document you receive from your vendor/shipper. You can use the Select More feature to select more than one tracking line.
- The Container Tracking page will now be populated with either the serial or lot numbers you selected.
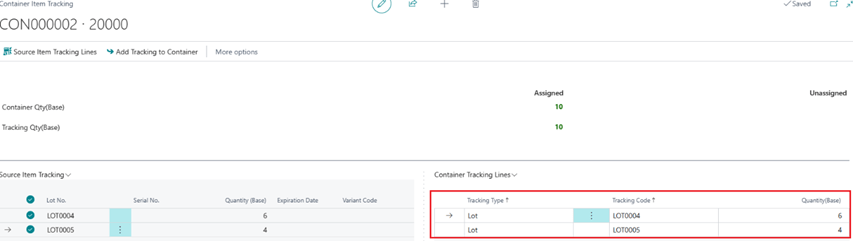
For Lot controlled items, you will need to update the Quantity(Base) field on the lines to match what is being shipped on the container. You will not need to do this for Serial controlled items.
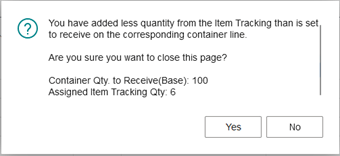
If you have not added enough tracking quantity for the container line, you will be alerted that you have not added enough tracking quantity. Click “No” if you want to correct the issue. Click “Yes” if you will correct this later. You will not be allowed to leave the page if you have over-added tracking quantities.
When you process the departure of the container, the added tracking information will be the serial or lot tracking used throughout the processing of the container.
Security Seals #
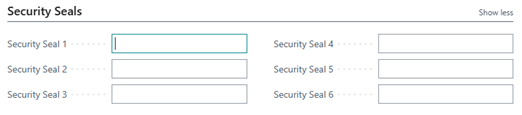
Security seals on cargo containers, made of metal or plastic, deter tampering and theft during transit. They vary in forms like bolt, cable, or plastic seals, each with a unique tracking identifier. Containers usually have multiple seals, one on each door, ensuring thorough security and visible evidence of unauthorized access. These measures safeguard cargo and maintain accountability across the supply chain. The Freight Container Receiving Management app streamlines seal management by allowing input for up to six seals per container. These fields are located on the Container Card.
Setting up Tariff and Duty #
You can set up the app to calculate tariff and duty %. To do this, you need to make sure of the following
- The Tariff No. is specified on the item card
- The Country of Origin Code is specified on the item card
Setup Tariff and Duty % #
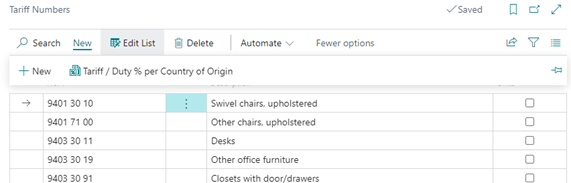
- Search for Tariff Numbers and select the corresponding link.
- Select the line that you wish to update the Tariff/Duty % for
- Click on New > Tariff / Duty % Per Country of Origin
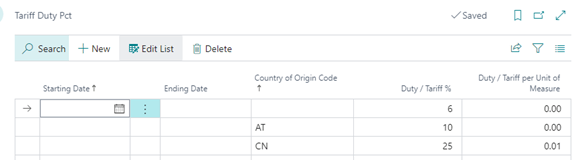
- Fill in the Tariff and Duty per country of origin
- Starting Date
- The starting date of the Tariff/Duty. Leave blank if not applicable.
- Ending Date
- The ending date of the Tariff/Duty. Leave blank if not applicable.
- Country of Origin Code
- The Country of Origin that the Tariff/Duty should be calculated for. If this is left blank, then items with blank country of origin will utilize this calculation.
- Duty/Tariff %
- The percentage of the Tariff/Duty
- Duty/Tariff per Unit of Measure
- This is the fixed amount per unit of the item that you are receiving.
- Starting Date
Tariff assignment on Container Lines #
When adding purchase lines to the container, the Country of Origin Code and Tariff No. will be pulled from the Item record onto the Container Line. These fields are editable to provide flexibility to update as needed.

Landed Cost Allocation #
Record landed cost by clicking on the Landed Cost Allocation on the Container Document. Update and post purchase documents to allocate the item charges once the container has been received into inventory.
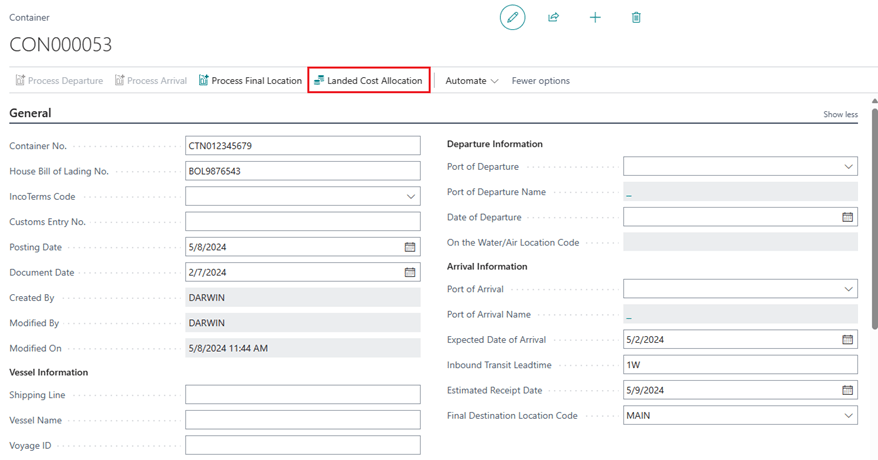
You can enter landed costs separately and specify different allocation methods, as well as different Vendors.

Landed Cost Allocation Methods #
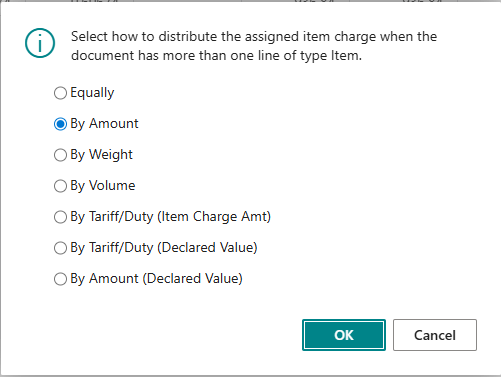
The landed cost module supports all standard Business Central item charge assignment methods, enabling charges to be distributed across purchase lines using built-in allocation options such as Equally, By Amount, By Weight, and By Volume.
In addition to these standard methods, the module includes three custom assignment methods to support duty and customs-related cost allocation:
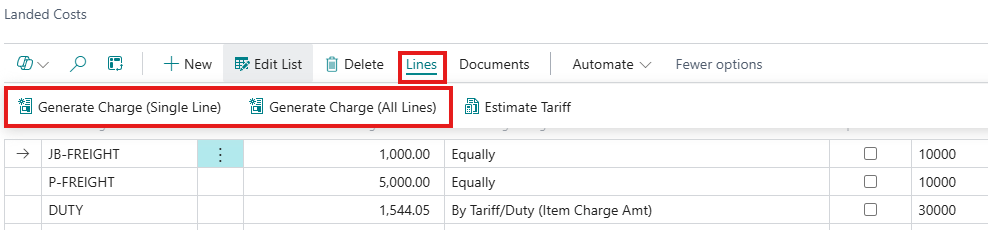
- By Tariff/Duty (Item Charge Amt) – Allocates charges based on the item charge amount associated with each line’s tariff or duty. The Item Charge Amt comes from the purchase receipt lines.
- By Tariff/Duty (Declared Value) – Distributes charges proportionally using the declared value of each line, weighted by its tariff or duty classification. Declared Value can be defined either on the Container lines or in the Item Charge Assignment page.
- By Amount (Declared Value) – Allocates charges in proportion to the declared value of each purchase receipt line. Declared Value can be defined either on the Container lines or in the Item Charge Assignment page.
These custom methods provide greater accuracy when landed costs include duties or customs charges that are tied to declared values or tariff classifications rather than standard invoice amounts.
Create Purchase Document from Landed Cost #
After the landed costs are entered and the container has been received into inventory:
- Select Generate Charge (Single Line) to only process the line currently selected or select Generate Charge (All Lines) to process all lines for each vendor.
- Select which Document Type to use when creating the Landed Cost purchase document and click OK. You can choose to add the Landed Cost lines to new purchase documents or append them to existing purchase documents.
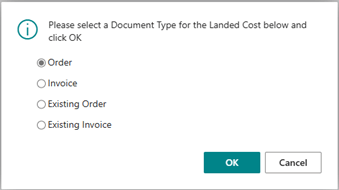
- Selecting Order or Invoice will create new purchase documents, when you click OK new purchase documents will be created, and you will be notified with the number created.
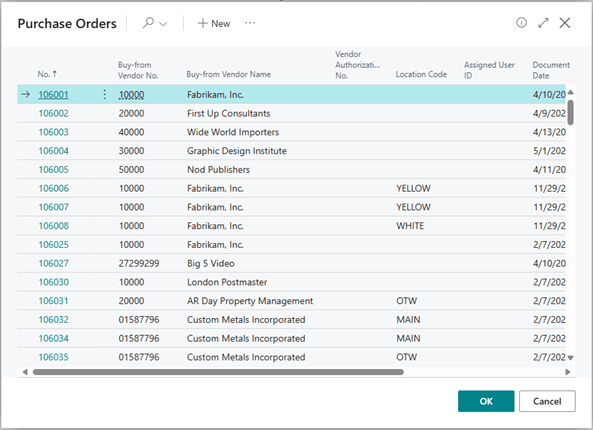
- If you select Existing Order or Existing Invoice, you will be prompted to select which document you want to add the Landed Cost charges. Select a document that matches the Vendor assigned to your charge lines.
- Please be aware that when utilizing the ‘Process All Lines’ function, lines containing identical Vendor Numbers will be consolidated within the same purchase document. Any subsequent purchase documents generated for these matching Vendors will be organized into separate purchase documents. Additionally, if you are adding all lines to an existing purchase document, the Vendor for all Landed Cost lines must match the Vendor of the document selected.
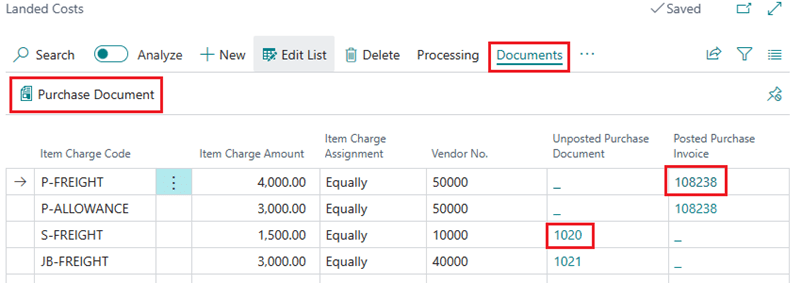
- After you create the Landed Cost purchase documents, you can review them either by clicking on Documents>>Purchase Document or clicking on the Purchase Document No. FlowFields. This will display the corresponding purchase document that the Landed Cost is assigned.
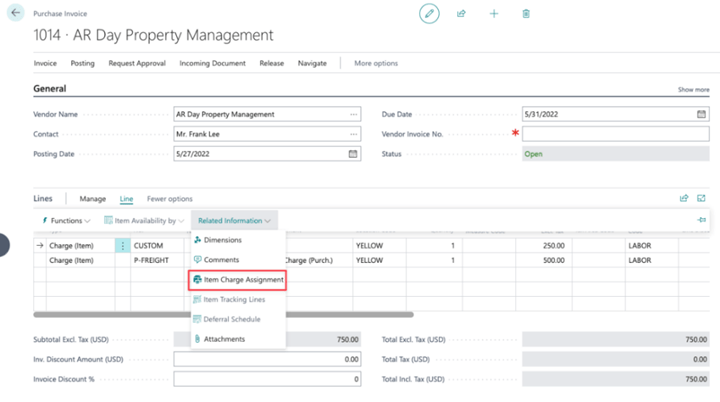
- Once the purchase document that recorded landed cost is open, go to Line > Related Information > Item Charge Assignment to view the allocation.
The landed costs have been allocated based on the allocation method you specified on the Container Documents.
- Adjust the allocation if needed. Then close the Item Charge Assignment window. On the purchase document, select Post to post the landed cost and create the posted purchase invoice.
Processing Tariffs through Landed Cost #
Tariffs can be either capitalized or expensed within the Landed Cost module. Users have the flexibility to designate tariff costs as inventory-related or non-inventory expenses, depending on how they configure the landed cost and item charge records.
Expense Tariffs #
Setup the Item Charge:
- Open the Item Charges list
- Select or Create an Item Charge to use as an expense charge
- Enter the Container Landed Cost Expense Type, Container Landed Cost Account No., and Expense check box.
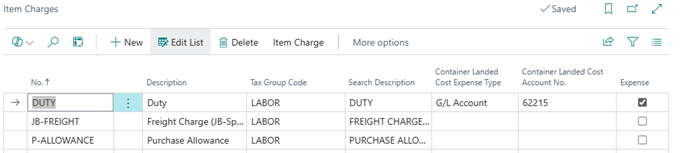
Container Landed Cost Expense Type: choose between G/L Account, Item (non-inventory), or Resource
Container Landed Cost Account No.: This is tied to the Type field and will be the account that the tariff cost will post against.
Estimate Tariff Charge #
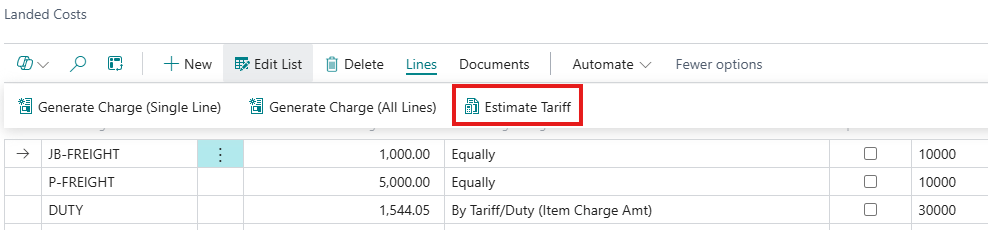
You can estimate the tariff charge prior to creating a purchase document.
- Select the Tariff/Duty cost line
- Click Line>>Calculate Estimated Tariff
*Note that if you’re allocating landed cost based on Tariff/Duty, you’ll need to verify that the total charged by your freight forwarder matches what’s calculated from the system based on the setup.
Special Note Item Charges #
Processing your tariff allocations is not limited to being performed through the Landed Cost page of a Container! You can allocate your tariff charges directly through the Item Charge Assignment page.
Now, when you add your receipt lines to your Item Charge Assignment, the Country of Origin and Tariff No. values will be added from the Item card. You are also able to define the Declared Value for the receipt lines on the Item Charge Assignment page. These fields are editable if you need to adjust them.
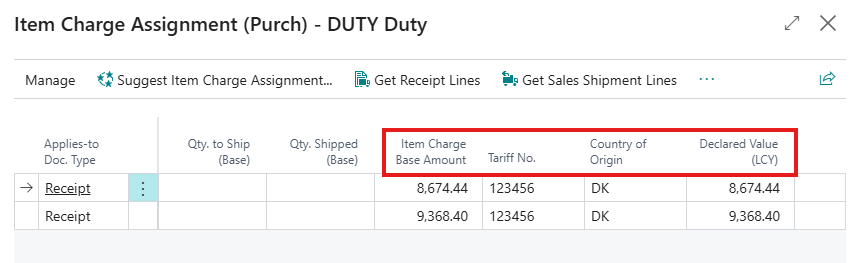
Next, when you select “Suggest Item Charge Assignment”, there is the option to split the charge based on Tariff:
The “Suggest Item Charge Assignment” process will calculate the Amount to Assign for each item based on the Tariff!
Vessel Tracking #
Track vessels in real time with Terminal49 to allow for accurate container visibility.
Setup Terminal49 and link your account #
Users will need to setup an account with Terminal49 (terminal49.com). They offer 3 separate tiers of pricing, which will depend on the amount of visibility wanted within Business Central.
- Free account: Users will be able to create a tracking request for Terminal49 within Business Central. However, this does NOT update the container information in Business Central, and does not provide GeoLocation into BC.
- Lite: Users can create tracking requests, and information from Terminal49 will populate automatically in Business Central. This option does not provide GeoLocation coordinates.
- Essential: On top of the Lite version, users will be able to see a geo map within Business Central with current coordinates.
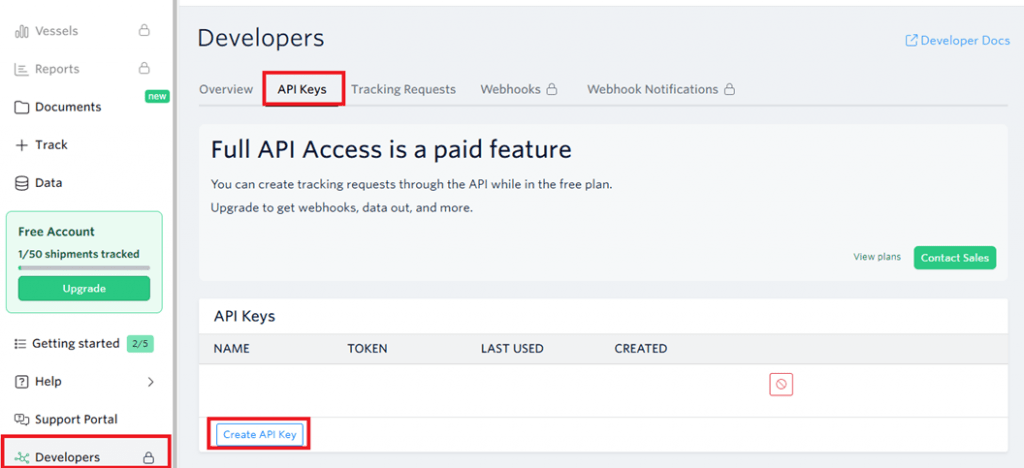
After setting up an account with Terminal49, an API Key is required to connect the account to Business Central. Obtain this within Terminal49 by going to the Developers tab > API Keys. Click on Create API Key, and save the TOKEN.
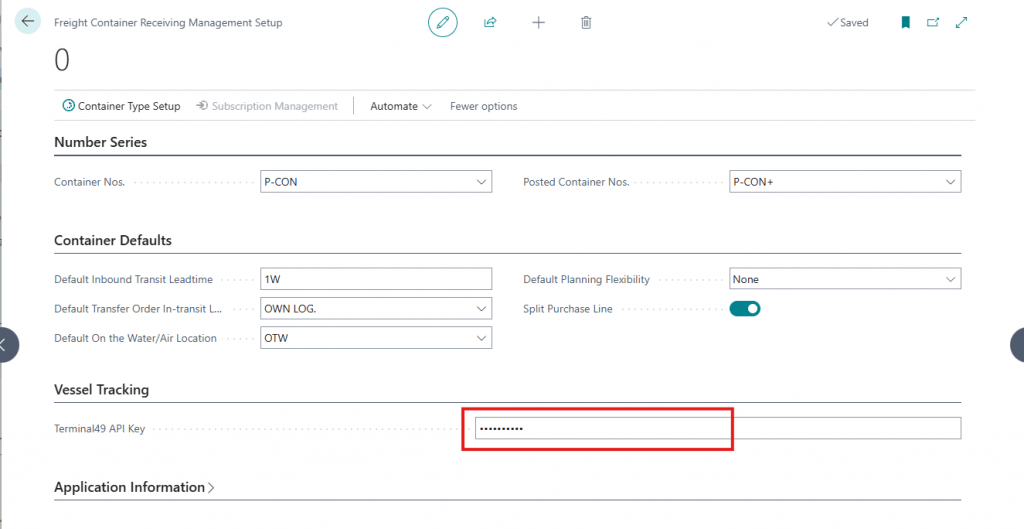
Once the TOKEN is created, copy the TOKEN value and enter it in the ‘Terminal49 API Token’ field of the Freight Container Management Setup page in Business Central.
Track your vessel #
Container record must have Container No. populated. For free accounts, SCAC code must also be populated before tracking.
Click on Home > Link with Terminal49. After confirmation message, the container will be tracked through Terminal49, and, depending on account type within Terminal49, information will be automatically filled in within business central.
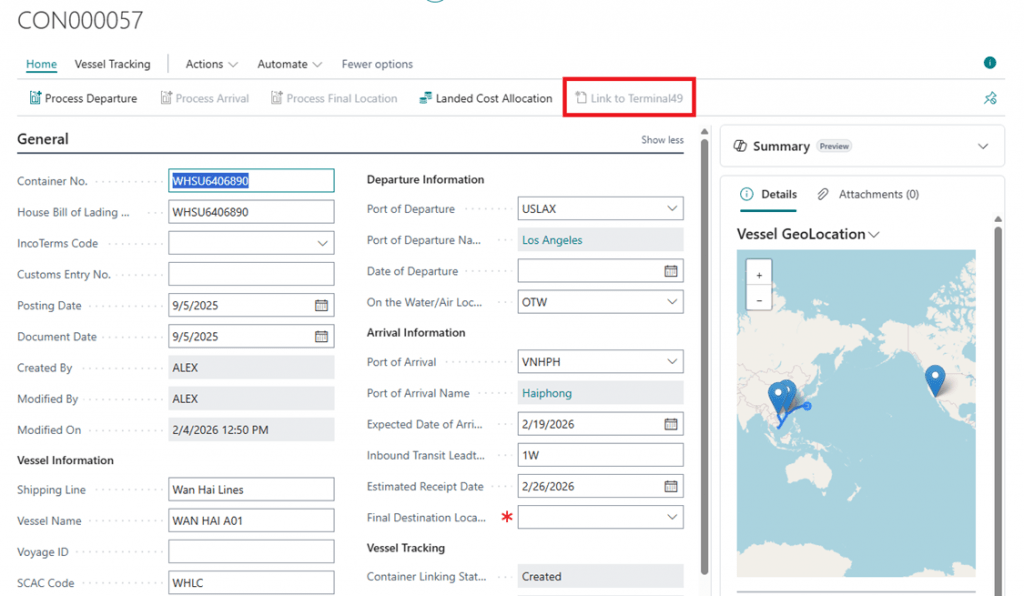
*Note: Terminal49 cannot track and create Container Lines, these will still need to be populated by the user


