

Create Application #
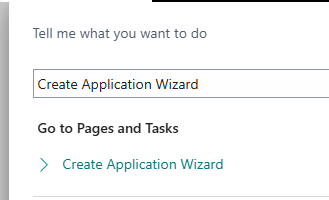
- Use Tell Me to search for and open the Create Application Wizard
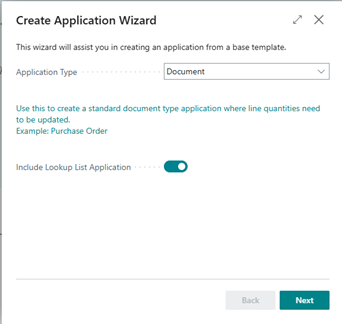
- Set the Application Type to Document and set Include Lookup List Application to True, then click Next
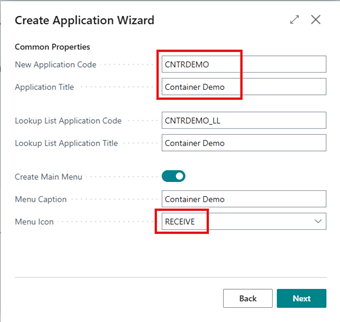
- Set the New Application Code and Application Title and select a Menu Icon, then click Next
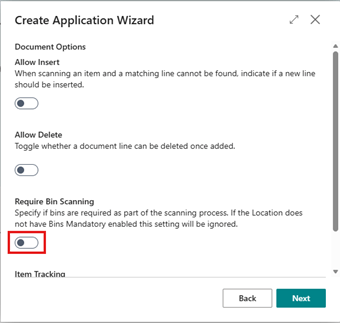
- Set Require Bin Scanning to False and click Next
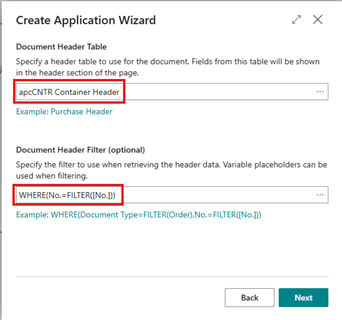
- Set the Document Header Table to apcCNTR Container Header and set the Document Header Filter to WHERE(No.=FILTER([No.])) and click Next
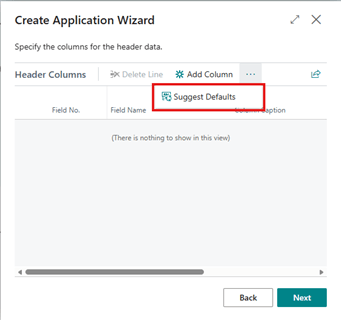
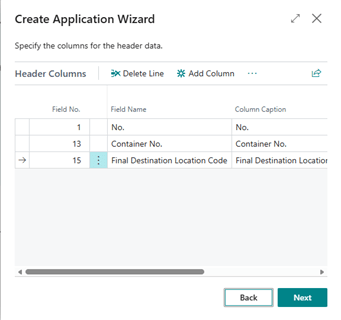
- Click on Suggest Defaults to add the record identifier fields to the columns
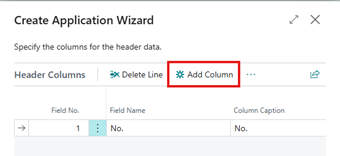
- Click on Add Column to add additional fields.
- Select a field to include and click OK
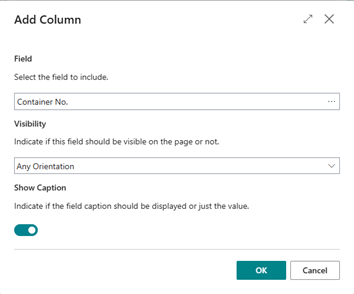
- Repeat the Add Column steps until you have added the columns you want and click Next
- Recommended fields
- No.
- Container No.
- Final Destination Location Code
- Recommended fields
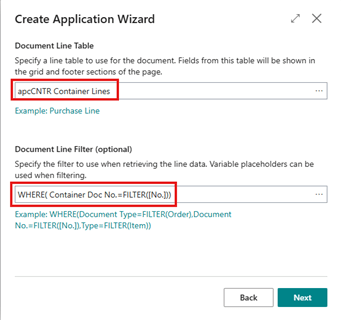
- Set the Document Line Table to apcCNTR Container Lines and set the Document Header Filter to WHERE( Container Doc No.=FILTER([No.])) and click Next
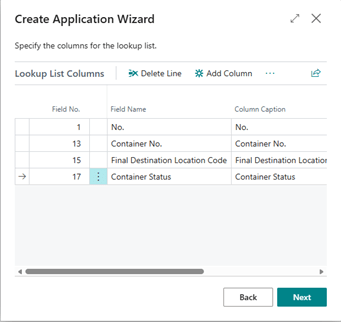
- Perform the Add Column Steps for the Document Line Table
- Recommended fields:
- Default Fields
- Line No.
- No.
- Update Column Caption to Item No.
- Description
- Qty. to Receive
- Change Column Order to 4
- Unit of Measure Code
- Change Column Order to 5
- Container Doc No.
- Change Column Order to 6
- Added Fields
- Container No.
- Set the Position to Footer
- Qty. On Container
- Mapped to Quantity (required)
- Change Column Order to 3
- Container No.
- Default Fields
- Recommended fields:

- Leave the defaults on Find Line Templates and click Next

- Set the Include field to Yes for theClose action and set the rest to No
- Leave the default on the Line Values page and click Next
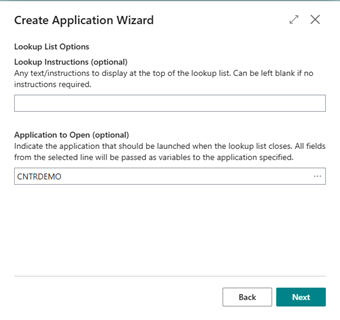
- Set the Lookup List Table to apcCNTR Container Header and set the Lookup List Filter to WHERE( Location Code=FILTER([Loc_Code]), ContainerStatus=FILTER(Arrived)) and click Next
- Perform the Add Column Steps for the Lookup List Table
- Recommended fields:
- Suggest Default Fields
- No.
- Added Fields
- Container No.
- Final Destination Location Code
- Container Status
- Suggest Default Fields
- Recommended fields:
- Review the Summary page and click Finish
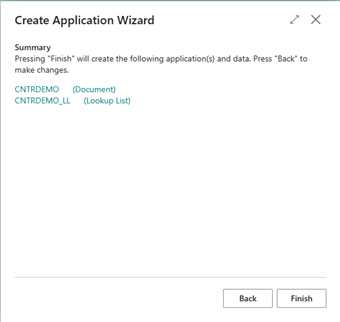
- There will now be 2 lines created in the Warehouse Insights Applications list
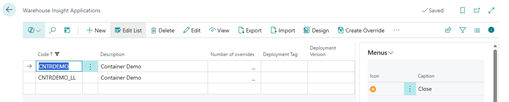
Add additional Fields to the Existing App #
- Open Warehouse Insight Application card page
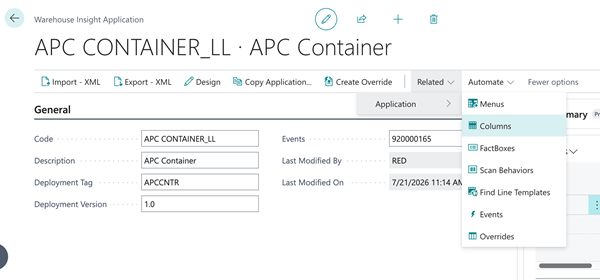
- Add additional columns by clicking on Related>Application> Column
Add Actions to Warehouse Insight Application #
- Open the Warehouse Insight Application page and select custom application line
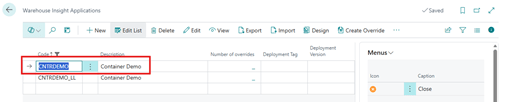
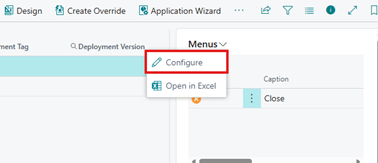
- In the Menus Factbox, click on the Menus dropdown and then Configure
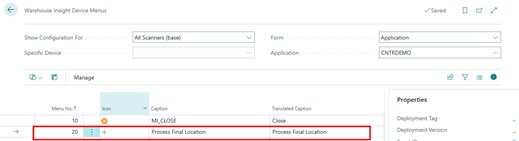
- Add a new line to add a new action and enter a Caption
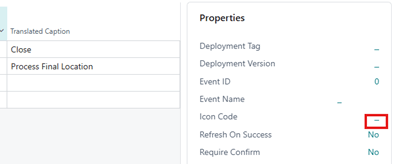
- Add an icon by clicking on the link for Icon Code in the Properties factbox
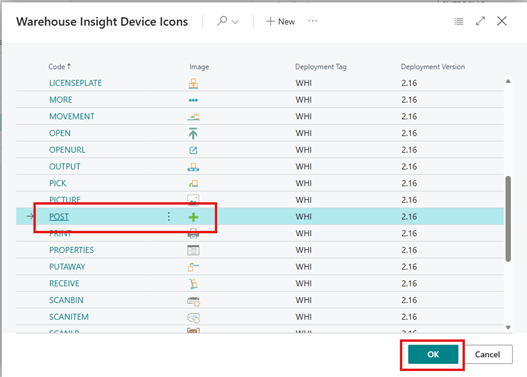
- Select an icon to use for the action and click OK
- Click on the link next to Standard Action
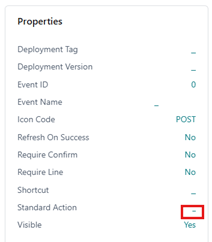
- Select Custom Application Event and click OK
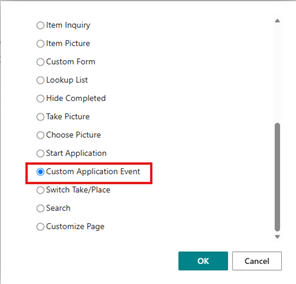
- Click the link next to Event Name in the Standard Action Properties Factbox
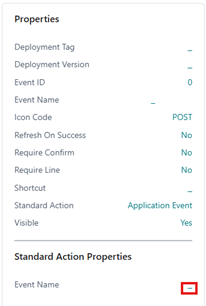
- Enter an Event Name and click OK
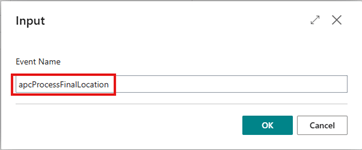
- Exit the Warehouse Insight Device Menus page
- Click on the Design action to create a custom event trigger point

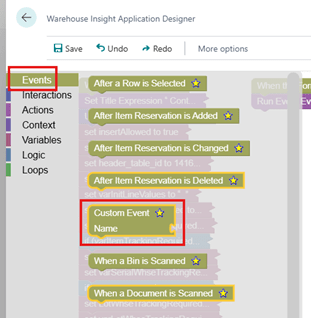
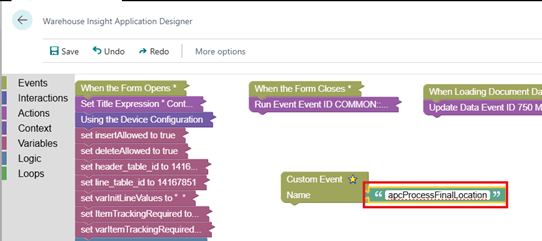
- Click on Events and drag the Custom Event Name option into the Designer
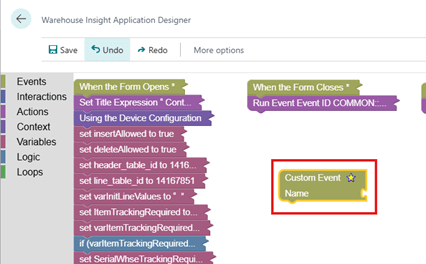
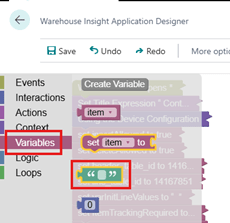
- Click on Variables and drag the “ “ option to connect to the Custom Event
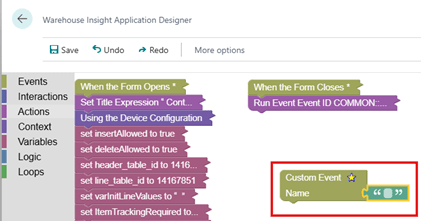
- Enter the Event Name created for the Standard Action Property
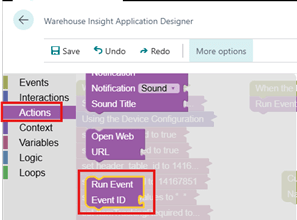
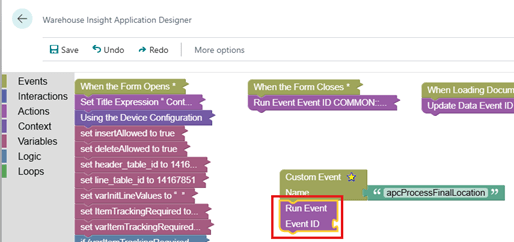
- Select Actions and drag the Run Event option to the Custom Event
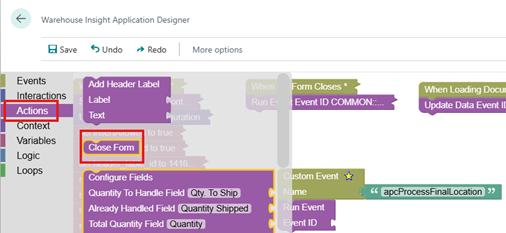
- Select Actions and drag the Close Form option to the Custom Event and attach the action to the bottom of the Run Event action
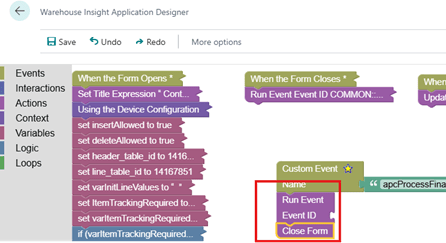
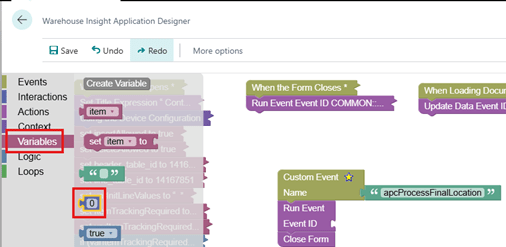
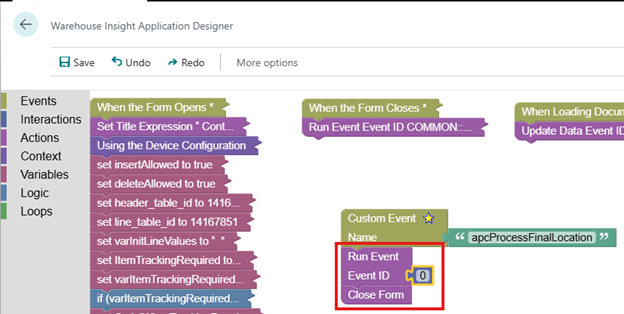
- Click on Variables and drag the number option to connect to the Custom Event
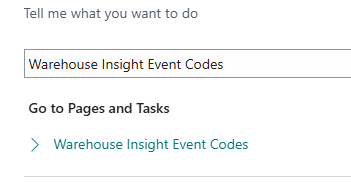
- Open the Warehouse Insight Event Codes page to add the event code for the custom event
- Click New

- Enter the following
- Event ID
- This needs to be manually entered and should be similar to the existing events for the Container pages
- Category
- This should match the non-Lookup Category (the one without the ’_LL’_)
- Function Name
- This should match the the Event Name added in the Application Designer
- CodeUnit
- Set this to 14167863
- Event ID
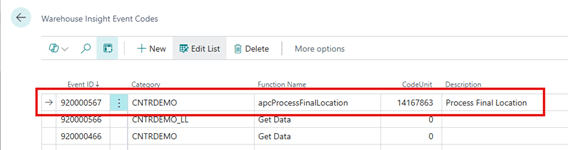
- Copy the Event ID and exit the Event Codes page to go back to the Application Designer
- In the number variable, paste the Event ID
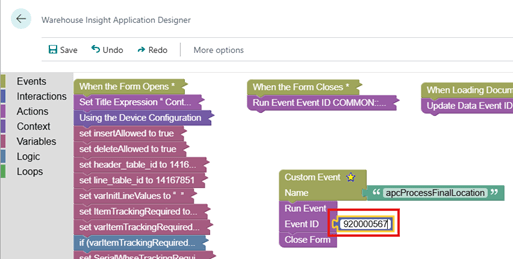
- Click Save and exit the Warehouse Insight Application Designer
Develop AL Extension to consume the event #
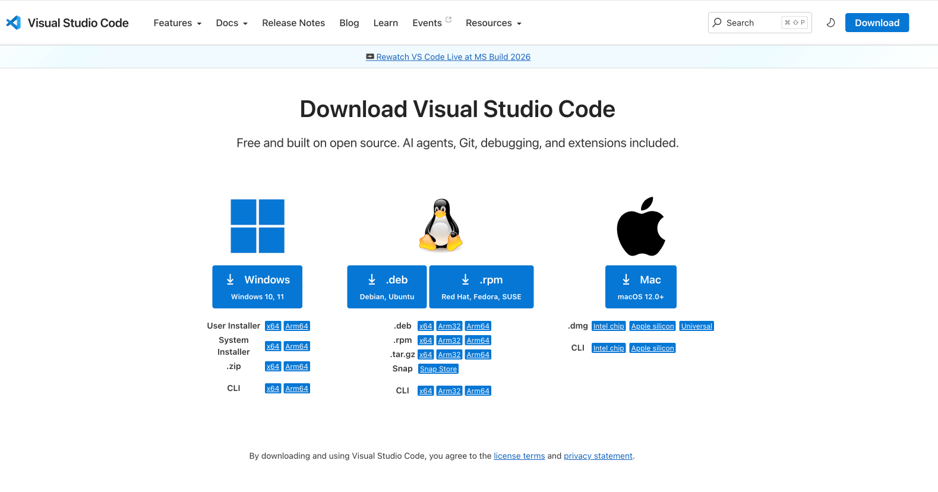
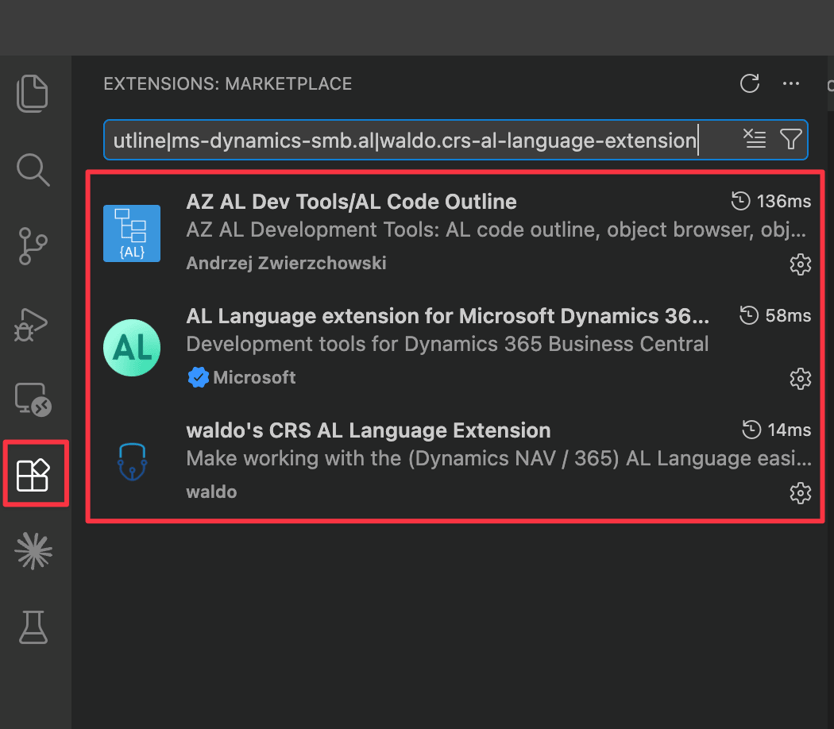
- Download and install VS Code along with the required AL development extensions
- Press F1 and run AL: Go! to create a new AL project.
- Update your launch.json file to connect the project to your specific Business Central Sandbox environment.
- Add all required Business Central dependencies to the app.json file.
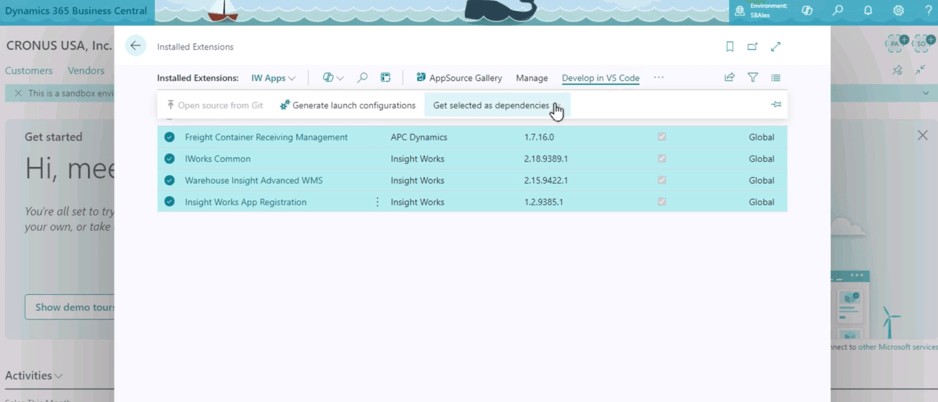
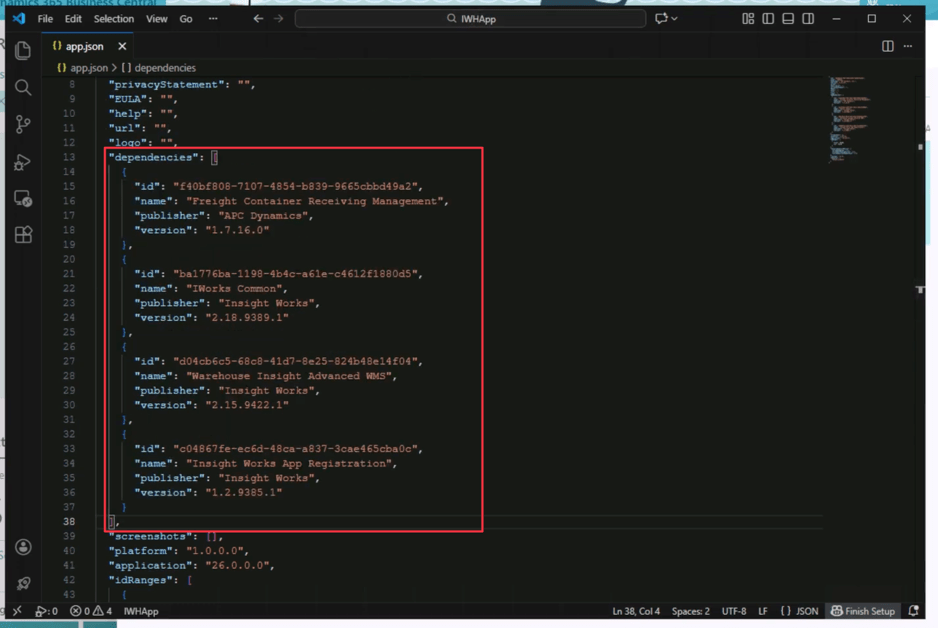
- Press F1 and run AL: Download symbols to retrieve the metadata from Business Central.
- Create a new Codeunit to handle your custom event. You will need to use the OnBeforeProcessEvent from WHI Custom Functions.
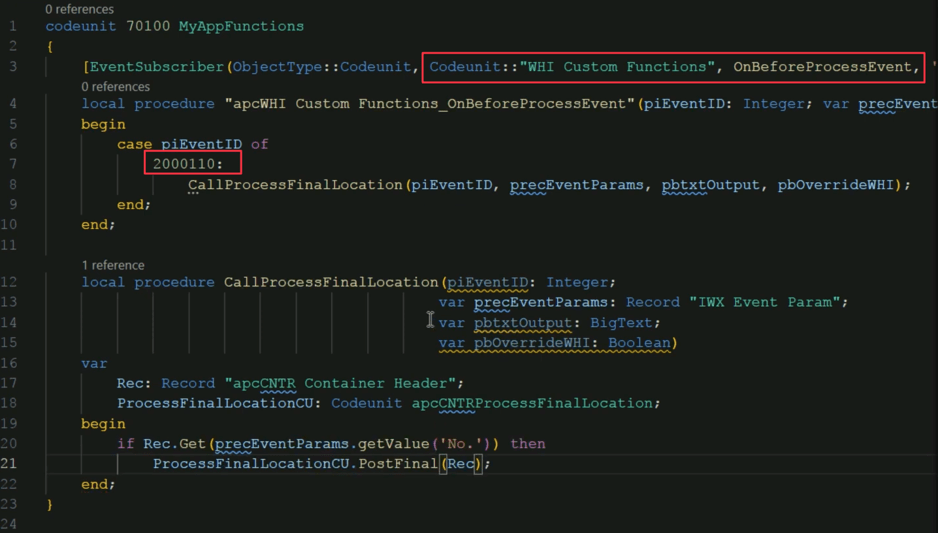
- Use the Event ID from the Warehouse Insight Event Codes step.
- Once the code is complete, press F1 to publish the app to Business Central.
- Finally, open the Insight Works app on your mobile device, reload the configuration, and verify that the new action button works as expected


