

Track vessels in real time with Terminal49 to allow for accurate container visibility.
Setup Terminal49 and link your account #
Users will need to setup an account with Terminal49 (terminal49.com). They offer 3 separate tiers of pricing, which will depend on the amount of visibility wanted within Business Central.
- Free account: Users will be able to create a tracking request for Terminal49 within Business Central. However, this does NOT update the container information in Business Central, and does not provide GeoLocation into BC.
- Lite: Users can create tracking requests, and information from Terminal49 will populate automatically in Business Central. This option does not provide GeoLocation coordinates.
- Essential: On top of the Lite version, users will be able to see a geo map within Business Central with current coordinates.
After setting up an account with Terminal49, an API Key is required to connect the account to Business Central. Obtain this within Terminal49 by going to the Developers tab > API Keys. Click on Create API Key, and save the TOKEN.
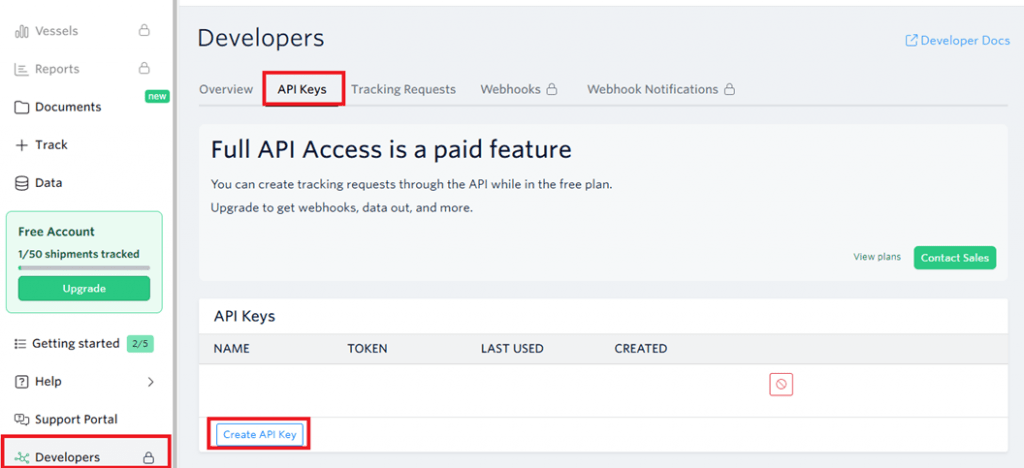
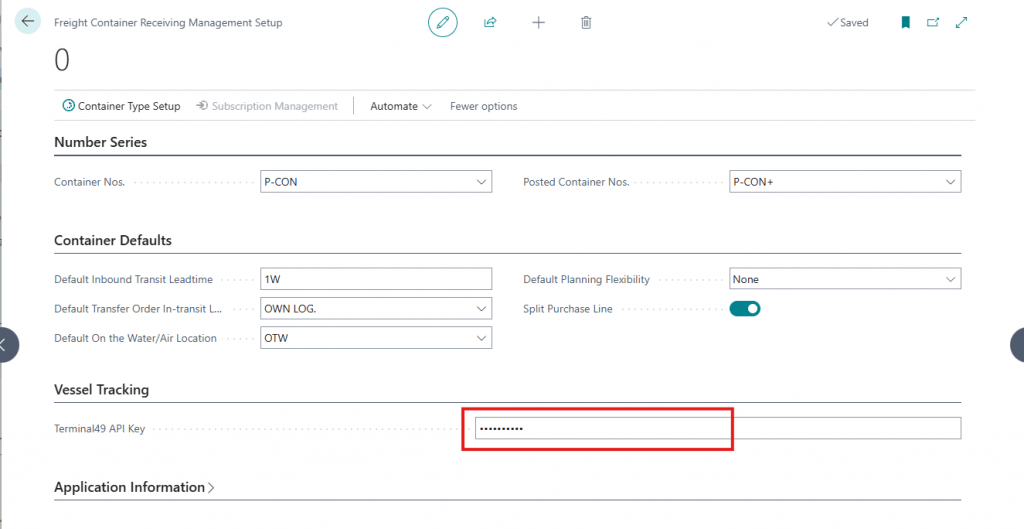
Once the TOKEN is created, copy the TOKEN value and enter it in the ‘Terminal49 API Token’ field of the Freight Container Management Setup page in Business Central.
Track your vessel #
Container record must have Container No. populated. For free accounts, SCAC code must also be populated before tracking.
Click on Home > Link with Terminal49. After confirmation message, the container will be tracked through Terminal49, and, depending on account type within Terminal49, information will be automatically filled in within business central.
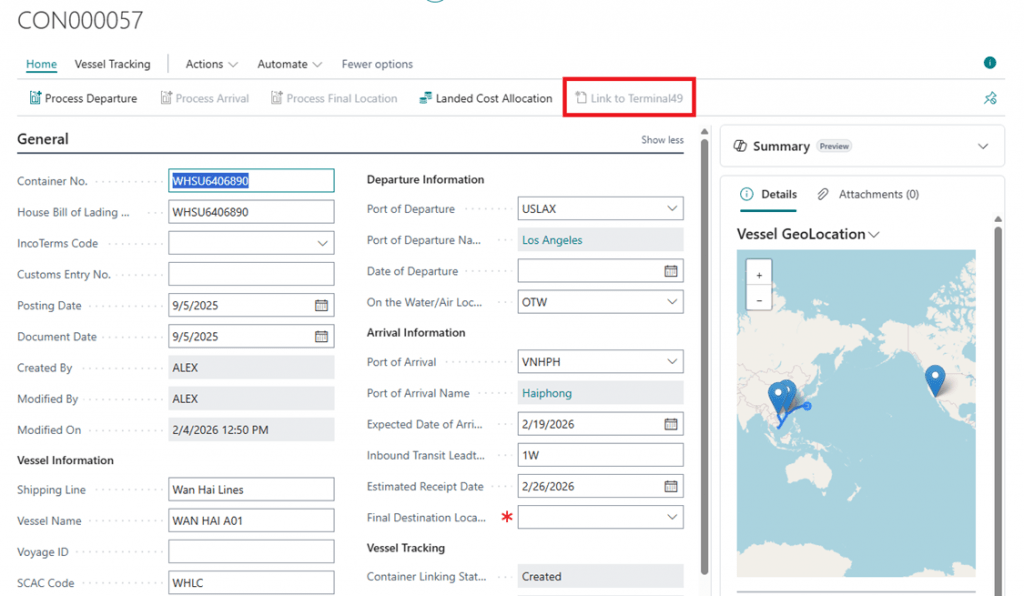
*Note: Terminal49 cannot track and create Container Lines, these will still need to be populated by the user
Fields updated by Terminal49 integration #
- House Bill of Lading No.
- SCAC Code
- Shipping Line
- Port of Departure
- Port of Arrival
- Vessel Name
- Vessel IMO
- Expected Date of Arrival
- Est. Departure Date
- Date of Departure


